
Have you ever wondered what happens when salty meets sweet in the most irresistible way? Chocolate covered chips are the answer you didn’t know you were craving! This genius snack takes the satisfying crunch of potato chips and wraps it in rich, creamy chocolate, creating a flavor explosion that’s both comforting and exciting. Whether you’re a fan of salty treats or a die-hard chocolate lover, this recipe will speak to all your snack-time cravings.
In today’s post, we’ll dive into why chocolate covered chips are such a game-changer, the best types of chips and chocolate to use, creative add-ins, and foolproof tips for making them perfectly at home. Plus, we’ll share fun ideas for packaging them up as unforgettable gifts! Ready to elevate your snack game with this easy, delicious, and surprisingly elegant treat? Let’s get started!
Table of Contents
Key Benefits of Chocolate Covered Chips
Why Chocolate Covered Chips Are the Perfect Sweet and Salty Treat
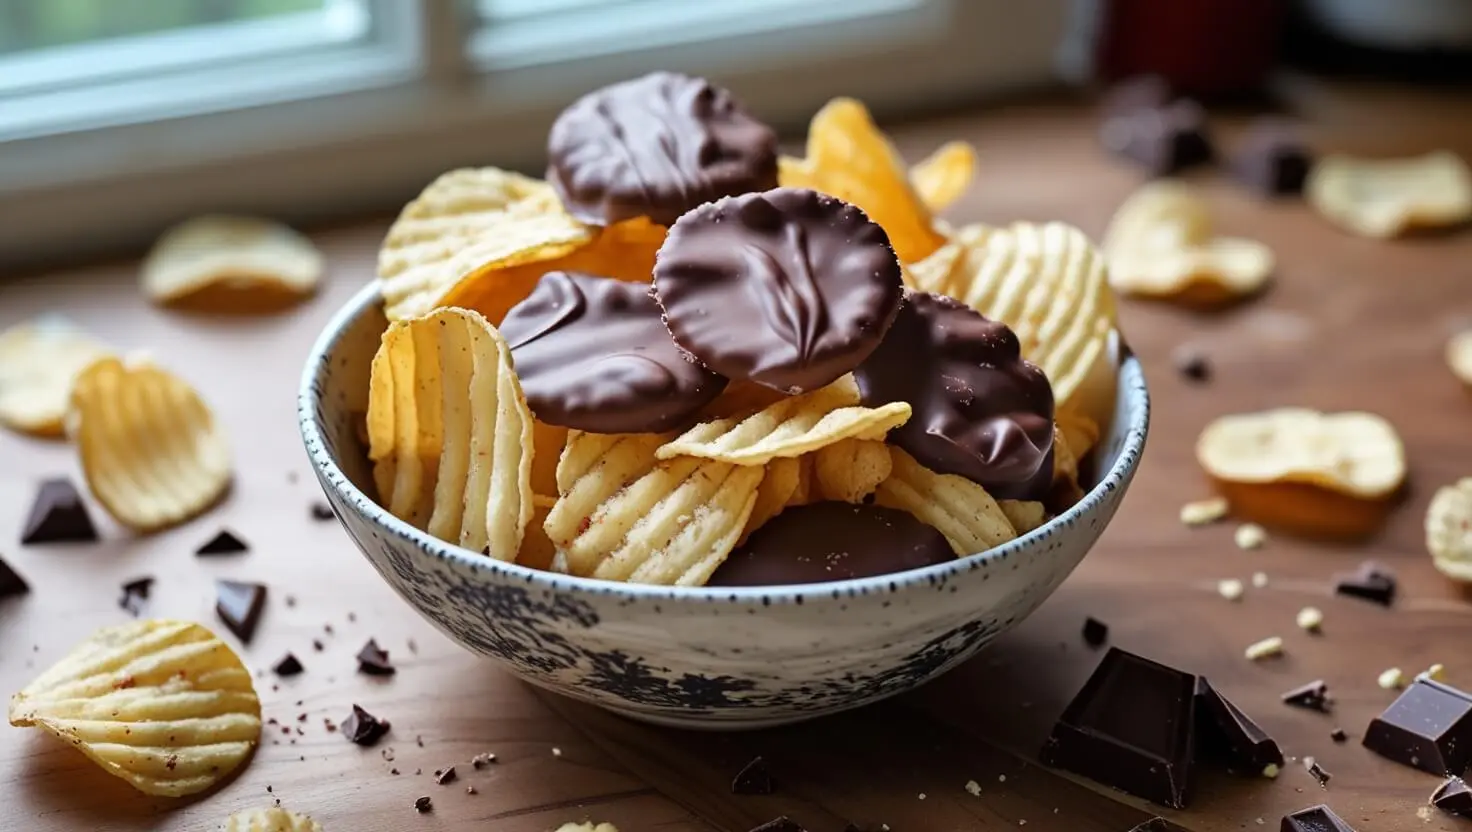
Got a craving for something that’s both sweet and salty? Chocolate covered chips are the perfect treat, blending the satisfying crunch of chips with the creamy sweetness of chocolate. I still remember the first time I tasted them — I couldn’t believe how irresistible they were! The contrast between the salty bite and the smooth chocolate coating makes every piece a delicious surprise.
Whether you’re hosting a party, enjoying a movie night, or just looking for a quick treat, chocolate covered chips are the answer. You can easily customize them with dark, milk, or white chocolate and even top them with nuts, sprinkles, or sea salt for added flavor. If you’re aiming for a healthier option, try using baked chips or air-popped popcorn for a lighter, yet equally delicious alternative.
Quick, Easy, and Fun to Make at Home
Looking for a snack that’s quick, easy, and fun to make at home? Chocolate covered chips are the perfect solution! You don’t need to be a pro in the kitchen to whip up this delicious treat. With just a few ingredients—chips and chocolate—you can create a mouthwatering snack that’s sure to impress.
The process is simple: just melt your chocolate, dip your chips, and let them set. It’s a no-fuss recipe that takes just minutes to prepare. Plus, it’s a fun activity for kids or a great idea for a DIY snack bar at your next gathering.
What’s even better? You can get creative! Add your favorite toppings, from crushed nuts to colorful sprinkles, or even a pinch of sea salt for that perfect sweet-salty balance. You can also experiment with different types of chocolate to find your ideal combination.
Whether you’re craving a quick treat or want to surprise guests with something special, chocolate covered chips are the perfect go-to. So why wait? Get in the kitchen and start creating this easy, fun, and delicious snack today!
Ingredients You’ll Need for the Best Chocolate Covered Chips
Choosing the Right Chips and Chocolate
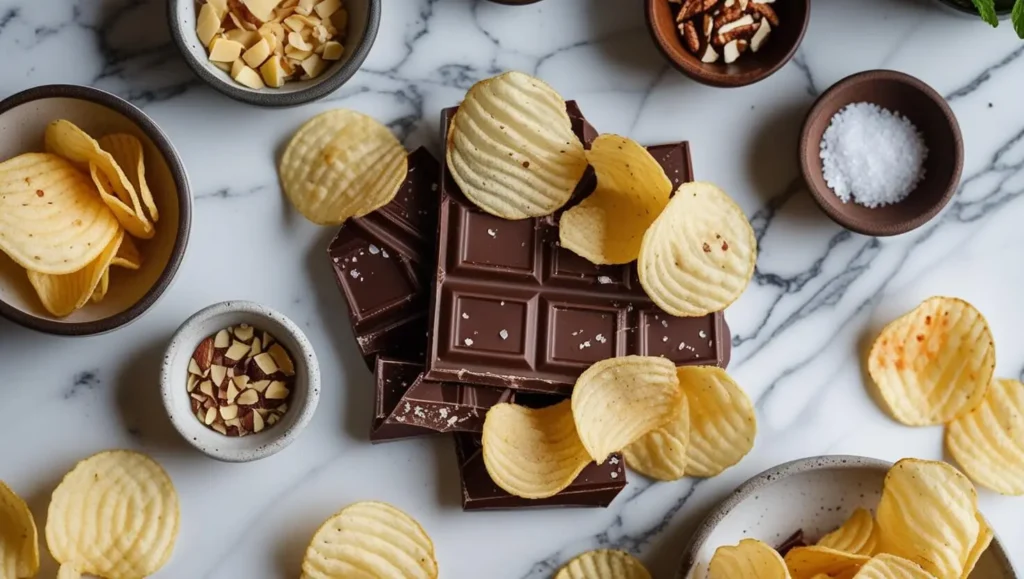
When making chocolate covered chips, selecting the right ingredients is crucial for achieving the perfect balance of flavors and textures. Here are some tips:
Chips:
- Classic potato chips: Ideal for their crunch and salty flavor.
- Sweet potato chips: A slightly sweeter and healthier alternative.
- Tortilla chips: A unique option for a different take on the snack.
Chocolate:
- Dark chocolate: Offers a rich, slightly bitter contrast that pairs perfectly with salty chips.
- Milk chocolate: Creamy and sweet, perfect for those with a sweet tooth.
- White chocolate: Mild and sweet, ideal for those who prefer a sweeter treat.
If you’re looking for a healthier option, opt for dark chocolate with a high cocoa percentage. Not only does it bring a deep, satisfying flavor, but it also offers a health boost.
Optional Toppings and Add-ins to Boost Flavor
To take your chocolate covered chips to the next level, consider adding some delicious toppings and mix-ins. These little extras can elevate your snack to a whole new flavor experience! Here are a few ideas:
Toppings:
- Crushed nuts: Walnuts, almonds, or pecans add a satisfying crunch and a nutty flavor that pairs perfectly with the sweetness of the chocolate.
- Sprinkles: Fun and colorful, sprinkles add a festive touch and a bit of extra sweetness.
- Sea salt: A pinch of sea salt enhances the sweet-salty balance, making every bite even more irresistible.
Add-ins:
- Coconut flakes: Shredded coconut offers a chewy texture and tropical flavor that blends beautifully with both milk and dark chocolate.
- Mini marshmallows: Perfect for a s’mores-inspired twist, these fluffy bites add sweetness and a fun texture.
- Dried fruits: Raisins, cranberries, or cherries add a tart contrast to the rich chocolate and salty chips.
Experimenting with these optional toppings and add-ins lets you personalize your chocolate covered chips to suit your cravings and create a treat that’s uniquely yours!
How to Make Chocolate Covered Chips Step-by-Step
Melting the Chocolate Perfectly
One of the keys to making perfect chocolate covered chips is melting the chocolate just right. Whether you’re using dark, milk, or white chocolate, getting that smooth, glossy texture is essential. Here are a few tips to melt your chocolate perfectly:
Double Boiler Method:
- Fill a saucepan with a little water and place a heatproof bowl on top (making sure the bowl doesn’t touch the water). Heat the water over medium heat and stir the chocolate in the bowl until it’s completely smooth.
Microwave Method:
- Break the chocolate into small pieces and place them in a microwave-safe bowl. Microwave in 20-second bursts, stirring well after each round. This slow-and-steady method keeps the chocolate from scorching. When it’s silky and fully melted, you’re all set to start dipping!
Tips for Smooth Chocolate:
- Stir frequently to avoid overheating the chocolate, which can cause it to seize.
- If the chocolate is too thick, add a small amount of vegetable oil or butter to thin it out.
Getting your chocolate just right will make your chocolate covered chips even more irresistible. A smooth, shiny coating will not only look great but will also enhance the flavor of your sweet-salty treat!
Dipping, Setting, and Storing Your Chips
Now that your chocolate is melted, it’s time to dip those chips and create your sweet and salty masterpiece. Follow these steps for the perfect chocolate covered chips:
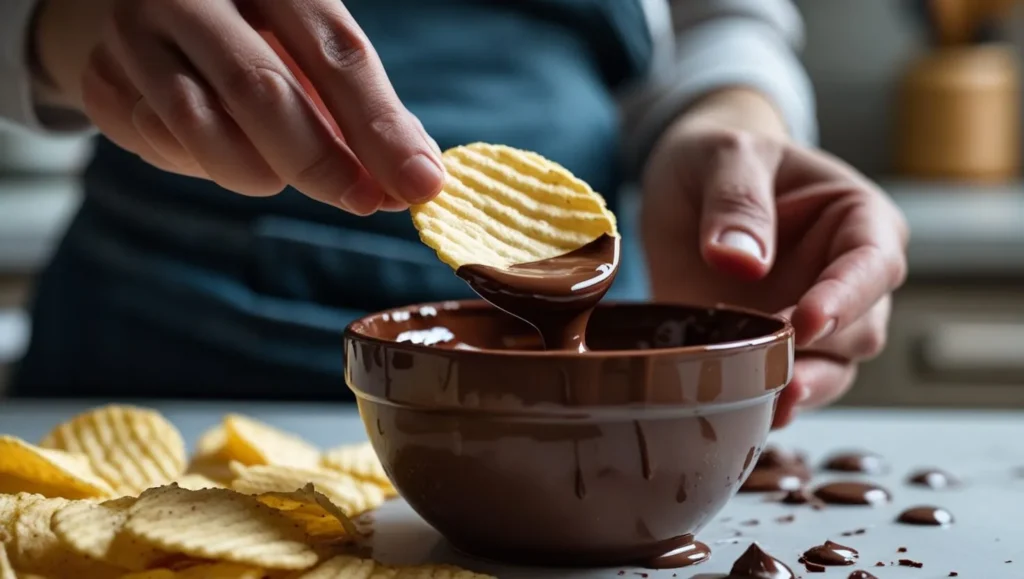
Dipping:
- Using a fork or a spoon, dip each chip into the melted chocolate, ensuring it’s fully coated. Let any excess chocolate drip off.
- For a neat finish, you can gently tap the fork on the side of the bowl to remove extra chocolate.
Setting:
- Place the dipped chips on a baking sheet lined with parchment paper. Spread them out so they don’t stick together.
- Let them sit at room temperature for about 30 minutes or place them in the fridge for quicker setting (10-15 minutes).
Storing:
- Once the chocolate has set, store your chocolate covered chips in an airtight container.
- Keep them in a cool, dry place for up to a week, or in the fridge for a slightly longer shelf life.
For best results, enjoy them within the first few days, when they’re freshest and crispiest. Happy snacking!
Pro Tips and Delicious Variations
Common Mistakes to Avoid When Making Chocolate Covered Chips
Even though making chocolate covered chips is simple, a few common mistakes can trip you up. Here’s what to watch for:
Overheating the Chocolate
- Chocolate can burn quickly if overheated. Always melt it slowly over low heat or use a microwave in short bursts, stirring often.
Using the Wrong Type of Chips
- Thin or overly greasy chips don’t hold up well. Choose sturdy, thick-cut potato chips to balance the chocolate coating.
Skipping the Setting Time
- Rushing the setting process can cause smudged chocolate and messy chips. Always allow enough time for the chocolate to harden completely before handling.
Poor Storage
- Leaving your chocolate covered chips exposed to air can make them stale. Store them in an airtight container in a cool place to maintain crunch and flavor.
Fun Flavor Variations to Try
One of the best things about making chocolate covered chips is how easy it is to get creative! Once you master the basic recipe, try adding fun twists for even more delicious bites:
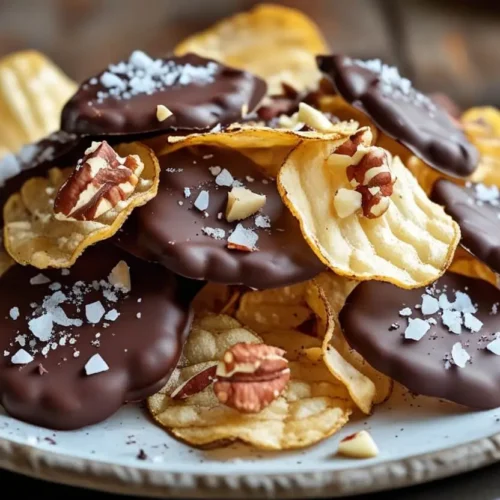
– Dark Chocolate and Sea Salt:
Sprinkle flaky sea salt over dark chocolate-dipped chips for an extra punch of sweet and salty flavor.
– White Chocolate and Crushed Candy Canes:
Perfect for the holidays, this combo adds a refreshing minty crunch.
– Peanut Butter Drizzle:
Melt peanut butter and drizzle it over your chocolate covered chips for a rich, nutty boost.
– Spicy Kick:
Add a pinch of cayenne pepper or chili powder to the melted chocolate for a surprising spicy-sweet treat.
– Healthy Recipes Twist:
Use dark chocolate with a high cocoa percentage and lightly salted kettle-cooked chips to make a better-for-you version that still satisfies!
Mix and match flavors to find your favorite! What wild flavor combos would you try on your chocolate covered chips? Drop your ideas below—we love hearing new twists on classic snacks!
Serving Suggestions for Chocolate Covered Chips
Perfect Occasions to Serve Chocolate Covered Chips
Wondering when to bring out your homemade chocolate covered chips? Honestly, there’s never a wrong time! These sweet and salty treats fit perfectly into so many celebrations:
– Game Day Parties:
Serve chocolate covered chips alongside your favorite savory snacks for a winning game day spread.
– Birthday Bashes:
Add them to your dessert table for a crunchy, chocolatey surprise guests will rave about.
– Holiday Gatherings:
Chocolate dipped chips make festive treats for Christmas, Thanksgiving, or even Fourth of July barbecues!
– Movie Nights:
Skip the store-bought candy—your homemade chocolate covered chips are the ultimate movie snack upgrade.
– Potlucks and Picnics:
Easy to pack and even easier to eat, they’ll be a guaranteed crowd-pleaser wherever you go.
Creative Ways to Package and Gift Them
Want to turn your delicious chocolate covered chips into the perfect gift? It’s easier than you think—and way more memorable than a store-bought treat!
– Mason Jars:
Fill small mason jars with your chocolate covered chips, tie a colorful ribbon around the lid, and add a handwritten tag for a personal touch.
– Cellophane Bags:
Clear cellophane bags let the beautiful chocolate shine! Seal them with a fun sticker or a festive twist tie.
– Decorative Tins:
Reuse holiday cookie tins or find themed tins at craft stores. They make a charming and reusable package for your homemade treats.
– Mini Gift Boxes:
Line small boxes with parchment paper and stack the chips carefully inside. Perfect for party favors or thank-you gifts!
– Customized Labels:
Print custom labels with the name of your treat (like “Sweet & Salty Chocolate Chips”) to make your gift feel extra special.
Chocolate Covered Chips
Ingredients
- 4 cups / 200g wavy potato chips – Use thicker ridged chips for the best texture and durability during dipping.
- 1 ½ cups / 255g semi-sweet chocolate chips – Can substitute with dark or milk chocolate depending on preference.
- 1 tsp coconut oil optional – Helps make the chocolate smoother and glossier for dipping.
- Flaky sea salt optional – Sprinkle on top before setting for an extra punch of flavor.
Optional toppings:
- 2 tbsp crushed peanuts
- 1 tbsp mini sprinkles
- 1 tbsp white chocolate drizzle
Instructions
- Prepare the Chips:Line a baking sheet with parchment paper and lay out your potato chips, selecting whole, unbroken pieces.
- Melt the Chocolate:Add the chocolate chips and coconut oil (if using) to a microwave-safe bowl.Microwave in 20-second intervals, stirring between each, until smooth and melted.Tip: Stir thoroughly after each interval to prevent overheating or burning.
- Dip the Chips:Hold a chip by one end and dip it halfway into the melted chocolate.Gently shake off excess chocolate and place it on the parchment-lined tray.Optional: Sprinkle toppings immediately while chocolate is still wet.
- Set the Chocolate:Place the tray in the refrigerator for 20–30 minutes or until chocolate is firm.
- Serve or Store:Once set, transfer to an airtight container. Store at room temperature for up to 3 days.
Notes
- Use high-quality chocolate for best flavor and melting results.
- For a vegan version, choose dairy-free chocolate chips.
- Avoid overly thin or greasy chips—they may break during dipping.
- This recipe is perfect for holiday treats, movie nights, or gifting.
Have you given our recipe a try?