
Have you ever taken a bite of a store-bought zebra cake and wondered if you could recreate something even more delicious at home? Zebra cakes are a timeless favorite in the world of baking and desserts, with their signature chocolate-and-vanilla stripes that never fail to delight both kids and adults. But let’s face it: store-bought versions often fall short when it comes to freshness, flavor, and that personal touch only homemade treats can offer.
Imagine whipping up your own batch of moist, fluffy zebra cakes—fresh from the oven, tailored to your taste, and free from preservatives. Whether you’re a dessert enthusiast looking for your next baking adventure or simply craving a nostalgic treat, these homemade zebra cakes are sure to impress.
In this post, we’ll show you how to make zebra cakes from scratch that are better than anything you’ll find in a store. From essential tips on creating perfect stripes to fun variations that elevate your baking and desserts game, we’ve got you covered. Ready to create something truly special? Let’s dive in!
Table of Contents
What Are Zebra Cakes and Why Make Them at Home?
Understanding the Classic Zebra Cake
Zebra cakes are a beloved dessert in the world of baking and desserts, known for their stunning chocolate-and-vanilla striped pattern. Originally popularized as a store-bought snack cake, they’ve become a nostalgic treat for many, evoking memories of childhood lunchboxes and sweet indulgences. But what makes them so special, and why should you consider making them at home?
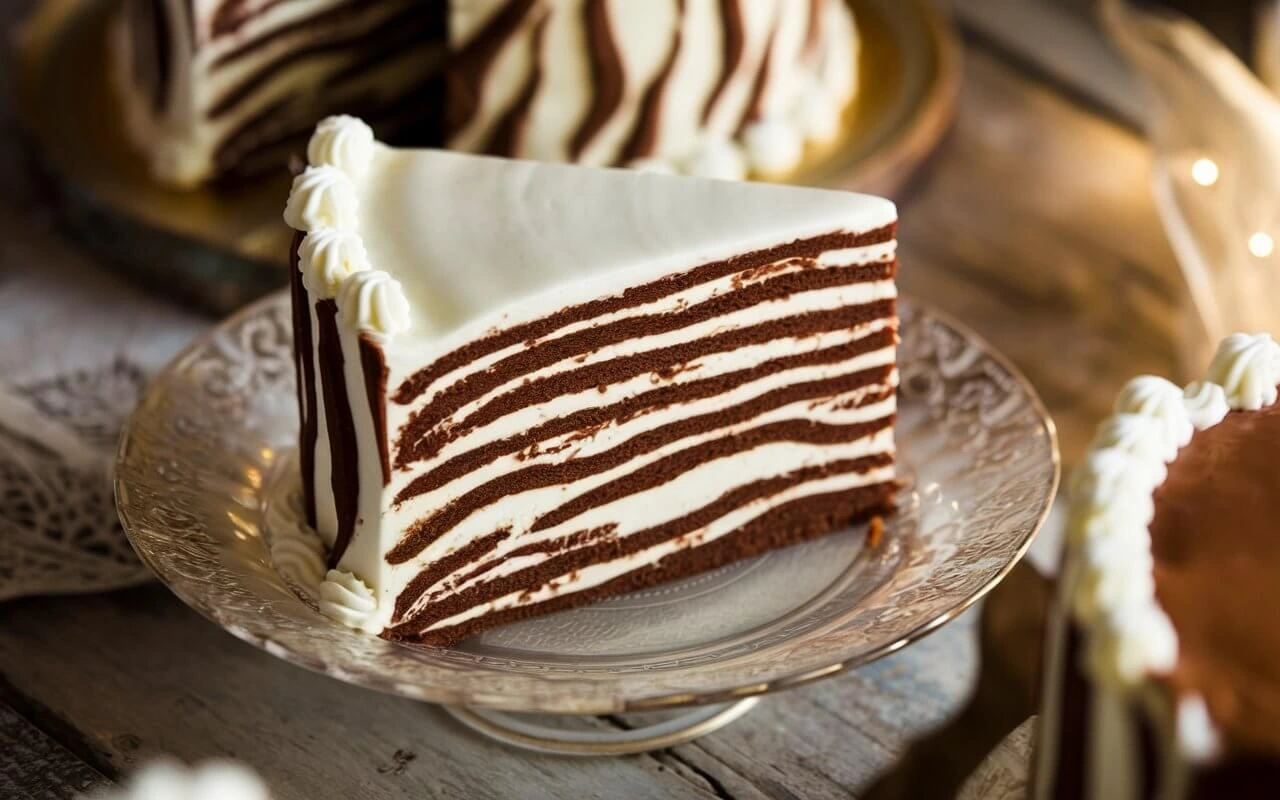
At its heart, a zebra cake is a delightful combination of chocolate and vanilla batter, carefully layered to create a mesmerizing stripe effect. When baked, the pattern is revealed, making every slice a feast for both the eyes and the taste buds. Store-bought versions, while convenient, often lack the freshness and rich flavors that homemade zebra cakes deliver.
By baking them yourself, you control every ingredient, ensuring a dessert that’s free from preservatives and customizable to your preferences. Whether you’re new to baking or a seasoned pro, making zebra cakes is both fun and rewarding. You can even get creative with flavors, shapes, or decorations to make your cakes truly unique.
Have you tried baking zebra cakes? What’s your favorite twist? Share your ideas and let your creativity shine with this timeless dessert!
Benefits of Homemade Zebra Cakes
Making zebra cakes at home offers a world of benefits that go beyond just their irresistible taste. Here’s why you’ll love baking them yourself:
1. Freshness and Flavor
Homemade zebra cakes are fresher, softer, and more flavorful than store-bought versions. By using high-quality ingredients like real butter, premium cocoa powder, and pure vanilla extract, you’ll enjoy a richer taste that simply can’t be matched.
2. Customization
One of the best perks of making zebra cakes at home is the freedom to customize. Want a gluten-free or vegan version? Prefer a hint of coffee in the chocolate batter? You can tweak the recipe to suit your dietary needs and flavor preferences.
3. Fun and Creativity
Baking zebra cakes is a fun project for bakers of all levels. Creating those perfect chocolate-and-vanilla stripes is both satisfying and rewarding. It’s also a great activity to share with kids, making baking time family bonding time.
4. Healthier Choice
Homemade means no preservatives, artificial flavors, or excessive sugar. You have full control over what goes into your cakes, making them a healthier alternative to pre-packaged options.
Essential Tools and Ingredients for Making Zebra Cakes
Creating perfect zebra cakes requires just a few basic tools and simple ingredients, making it an accessible project for any home baker.
Essential Tools
- Mixing Bowls: You’ll need at least two—one for the chocolate batter and one for the vanilla.
- Whisk and Spatula: A whisk for smooth batter mixing and a spatula for folding ingredients and layering.
- Cake Pan: An 8- or 9-inch round pan works best for creating the iconic striped design.
- Measuring Cups and Spoons: Precise measurements are key to a successful bake.
- Piping Bags or Spoons: Helpful for layering the batters evenly to achieve the zebra pattern.
Key Ingredients

- Flour and Sugar: Basic pantry staples for a moist, tender cake.
- Eggs: Provide structure and richness to the batter.
- Milk: Adds moisture and helps create a smooth texture.
- Butter or Oil: Ensures a soft crumb and rich flavor.
- Cocoa Powder: For that bold chocolate stripe.
- Vanilla Extract: Enhances the flavor of the vanilla batter.
- Baking Powder: Ensures your cake rises perfectly.
Step-by-Step Guide to Baking Perfect Homemade Zebra Cakes
Preparing the Batter for Striped Perfection

The key to achieving the perfect zebra cake lies in how you prepare and layer the batters. Here’s how to create those eye-catching stripes with ease:
1. Mix the Vanilla and Chocolate Batters
Start by making two separate batters: one vanilla and one chocolate. For the vanilla batter, mix flour, sugar, eggs, milk, butter, and baking powder. For the chocolate batter, simply add cocoa powder to the vanilla mixture. Make sure both batters are smooth and lump-free.
2. Layering the Batters
Now comes the fun part—layering the batters! Using two spoons, a piping bag, or an ice cream scoop, alternate spoonfuls of each batter in the center of your cake pan. Start with a scoop of vanilla batter, then add a scoop of chocolate right on top, letting them spread slightly. Repeat until the pan is filled. The batters will naturally spread out, creating a striped pattern.
3. Swirl (Optional)
If you want a more blended look, use a toothpick or skewer to gently swirl the two batters together in the pan. But be careful not to overdo it—this could turn the stripes into a marbled effect.
Creating the Zebra Effect
Achieving the signature zebra pattern is all about precision and patience. Here’s how to make sure those stripes come out beautifully every time:
1. Layering with Precision
Once your vanilla and chocolate batters are ready, the key to creating clean stripes lies in how you layer them. Using a spoon or a piping bag, place a small dollop of vanilla batter in the center of the pan. Then, place a scoop of chocolate batter directly on top of the vanilla. This will start forming concentric rings.
2. Alternating the Layers
Continue alternating between the two batters, adding one scoop at a time. Start each new layer directly on top of the last, allowing the batter to spread out naturally. The batter will begin to form a circular pattern as it spreads. Ensure that each layer is even to maintain the clean, defined stripes.
3. No Overmixing
The beauty of the zebra effect comes from the contrast of the batters. Avoid over-mixing or swirling too much, as this can blend the two batters together and reduce the distinctiveness of the stripes. Keep the pattern clean and precise for the best visual impact.
Baking and Frosting the Zebra Cakes
Once your zebra cake batter is perfectly layered, it’s time to bake and frost it to create a mouthwatering, eye-catching dessert! Here’s how to get that perfect finish:
1. Baking the Zebra Cake
Preheat your oven to 350°F (175°C) and place your cake in the center of the oven. Bake for 25-30 minutes, or until a toothpick inserted into the center comes out clean. The cake should rise beautifully and develop a golden brown top. Be sure to check the cake towards the end to avoid overbaking, as this can cause it to dry out.
2. Cooling the Cake
After baking, let the cake cool in the pan for about 10 minutes before transferring it to a wire rack. This prevents it from breaking apart. Allow the cake to cool completely before frosting to ensure the frosting doesn’t melt.
3. Frosting the Zebra Cake
For frosting, you can keep it simple with a classic buttercream or chocolate ganache. Spread a layer of frosting over the cooled cake, smoothing it out with a spatula. To create a polished look, pipe additional frosting along the edges or in decorative swirls on top. You can also sprinkle some cocoa powder for a decorative finish.
Tips, Tricks, and Variations for Homemade Zebra Cakes
Expert Tips for Baking Success
To ensure your zebra cake turns out as flawless as it looks, here are a few expert tips to help you achieve baking perfection:
1. Use Room Temperature Ingredients
For the best texture, make sure your butter, eggs, and milk are at room temperature before mixing. This helps the ingredients blend together smoothly, creating a light and airy batter that bakes evenly.
2. Don’t Overmix the Batter
While mixing, aim for a smooth batter without overmixing. Overmixing can lead to dense cakes. Stir just enough to combine the ingredients, and stop as soon as the batter is smooth.
3. Keep the Stripes Defined
When layering the batters, avoid spreading them too much. The goal is to have distinct vanilla and chocolate stripes, not a marbled effect. Be gentle and place the batter in the center of the pan for each layer to let it spread naturally.
4. Ensure Even Baking
To prevent uneven baking, make sure the cake pan is positioned in the center of the oven and that your oven is preheated properly. You may also want to rotate the cake halfway through baking to ensure it cooks evenly.
5. Get Creative with Frosting
Feel free to add a personal touch to your zebra cake by experimenting with different frosting flavors or decorations. A drizzle of chocolate ganache, colorful sprinkles, or even edible glitter can elevate the look and flavor.
Fun Variations and Customizations
While the classic zebra cake is a timeless favorite, there’s plenty of room for creativity! Here are some fun variations and customizations you can try to make your zebra cake even more exciting:
1. Flavor Twists
- Coffee Zebra Cake: Add a teaspoon of instant coffee to the chocolate batter for a rich, mocha flavor that pairs beautifully with the vanilla.
- Fruit-Flavored Zebra Cake: Mix in some fresh fruit, like berries or lemon zest, into the vanilla batter for a fresh, fruity twist.
- Spices and Extracts: Experiment with cinnamon, nutmeg, or almond extract to give your zebra cake a unique, seasonal flavor profile.
2. Gluten-Free or Vegan Options
- Gluten-Free: Swap regular flour for a gluten-free flour blend and use a gluten-free baking powder to keep the cake light and fluffy.
- Vegan Zebra Cake: Replace eggs with flax eggs and use plant-based milk and dairy-free butter for a delicious vegan version.
3. Decorative Finishes
- Swirled Frosting: Instead of a solid layer, create a swirled design with both chocolate and vanilla frosting for added visual appeal.
- Toppings and Sprinkles: Top your zebra cake with chopped nuts, coconut flakes, or colorful sprinkles for extra texture and fun.
- Chocolate Ganache Drizzle: Pour a luscious chocolate ganache over the top for a glossy, decadent finish.

Homemade Zebra Cakes That Are Better Than Store-Bought
Ingredients
- ½ cups all-purpose flour / 180g sifted)
- ¼ teaspoons baking powder / 5g
- ½ teaspoons salt / 2g
- ½ cup unsalted butter / 115g room temperature
- 1 cup granulated sugar / 200g
- 2 large eggs
- 1 teaspoon vanilla extract
- ¾ cup milk / 180ml (room temperature)
- 3 tablespoons cocoa powder / 15g
- 1 tablespoon vegetable oil (optional for a moist texture)
Frosting (Optional)
- ½ cup unsalted butter / 115g (room temperature)
- 2 cups powdered sugar / 240g
- 1 tablespoon milk / 15ml
- 1 teaspoon vanilla extract
Instructions
- 1.Preheat the oven to 350°F (175°C). Grease and flour an 8-inch round cake pan, or line it with parchment paper.
- 2.Prepare the batters:In a medium bowl, whisk together the flour, baking powder, and salt. In a separate large bowl, beat the butter and sugar together until light and fluffy (about 3-5 minutes).Add the eggs one at a time, beating well after each addition. Stir in the vanilla extract.Gradually add the dry ingredients, alternating with the milk, mixing just until combined.
- 3.Divide the batter:Separate the batter into two equal portions. To one portion, add the cocoa powder and stir until fully combined. Leave the other portion plain (vanilla).
- 4.Layer the batters:Spoon 2-3 tablespoons of the vanilla batter into the center of the prepared pan.Top it with 2-3 tablespoons of the chocolate batter, placing it directly on top of the vanilla.Repeat this process, alternating between vanilla and chocolate batters, until both are used up. The batter will naturally spread out, creating beautiful stripes.
- 5.Bake the cake:Bake for 25-30 minutes, or until a toothpick inserted in the center comes out clean.Allow the cake to cool in the pan for 10 minutes, then transfer it to a wire rack to cool completely.
- Frost the cake (optional):In a bowl, beat the butter for the frosting until smooth and creamy. Gradually add the powdered sugar, milk, and vanilla extract. Beat until fluffy.Once the cake is fully cooled, frost the top and sides of the cake with the frosting.
- Serve and enjoy:Slice and enjoy your homemade zebra cake! Perfect for serving at parties, family gatherings, or as an afternoon snack.
Notes
- Storage: Store the zebra cake in an airtight container at room temperature for up to 3-4 days. If refrigerated, it will last up to 1 week.
- Make it Gluten-Free: Swap regular flour for a gluten-free flour blend, and use a gluten-free baking powder to keep the texture light and airy.
- Vegan Option: Replace eggs with flax eggs (1 tbsp flaxseed meal + 3 tbsp water per egg) and use plant-based milk and butter.